6-Level Magnetic Trainer Stand: Indoor Rides for 700C
Magnetic Indoor Bike Trainer Stand Basics: Turn Your Bike Into an Indoor Workout Setup
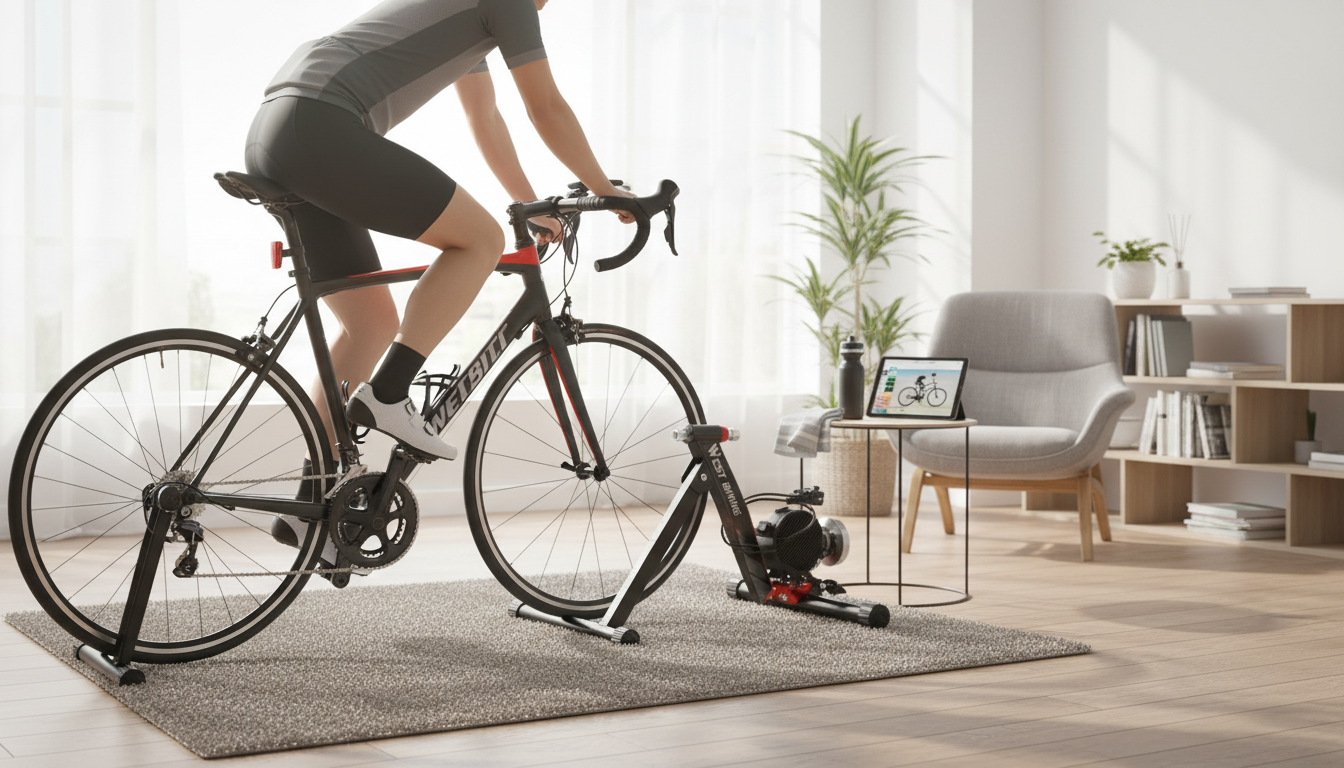
A magnetic trainer stand is a practical way to keep riding consistent when weather, traffic, or short daylight hours make outdoor miles harder to fit in. By supporting your bike’s rear wheel and adding adjustable magnetic resistance, a trainer lets you ride in place for warmups, aerobic base work, and structured intervals—without needing a direct-drive system or external power for resistance. For many riders, it becomes the simplest “always-ready” option for quick weekday sessions and pre-ride spin-ups. For more guidance, see Health Benefits of Indoor Cycling: A Systematic Review – PMC.
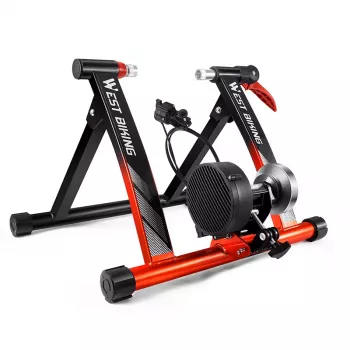
If you’re shopping for a compatible, straightforward option, start with the Magnetic Indoor Bike Trainer Stand for 24-28” & 700C Bikes – 6-Level Resistance, which is designed around common wheel sizes and an easy, step-based resistance system. For further reading, see The Benefits of Stationary Biking – Arthritis Foundation.
What a Magnetic Bike Trainer Stand Does
A rear-wheel magnetic trainer creates a stationary platform that holds your bike upright while the rear tire rolls against a resistance roller. Instead of relying on a fan or fluid unit, magnetic systems use magnets to create progressive load—typically controlled by a handlebar-mounted or frame-mounted adjuster with distinct levels.
- Creates a stable indoor riding position so your regular bike can be used at home.
- Delivers resistance without requiring a direct-drive drivetrain or complex electronics.
- Works well for steady cadence efforts (endurance/tempo) and short, controlled intervals depending on the level selected.
- Makes warmups and “get it done” sessions faster—set up the bike, spin, and start riding.
Indoor cycling is also a convenient way to build cardiovascular fitness and consistency. For a high-level overview of health benefits, see Cleveland Clinic’s explainer on indoor cycling benefits.
Bike Compatibility: 24–28 Inch and 700C Fit
Wheel-size fit is the first checkpoint. A trainer that supports 24–28 inch wheels and 700C covers a broad range of road bikes, many hybrids, and a number of youth/fitness bikes. The next (often overlooked) detail is rear axle hardware: many bikes use a quick-release skewer, while others use thru-axles that may require adapter hardware depending on the clamp design.
- Confirm your rear wheel is 24–28” or 700C for proper roller height and tire contact.
- Verify the rear axle type (quick release vs. thru-axle) and that the clamp system matches your bike’s hardware.
- Check clearance and centering so the tire sits squarely on the roller.
- Consider tire choice: smoother tires tend to ride quieter and wear more slowly on trainers.
| Check | What to verify | Why it matters |
|---|---|---|
| Wheel size | Rear wheel is 24–28” or 700C | Ensures correct roller height and contact |
| Rear axle | Quick release or compatible axle hardware | Determines clamp fit and stability |
| Tire condition | No cuts/flat spots; adequate tread | Reduces vibration and slipping |
| Space | Room for bike length + safe side clearance | Improves safety when mounting/dismounting |
How 6-Level Magnetic Resistance Changes Training
Six resistance levels give you a simple way to scale effort without relying on an app. Think of the levels as “ranges,” then fine-tune intensity with your bike gears and cadence. The most repeatable results come from keeping your setup consistent—especially tire pressure and roller tension—so each level feels similar from ride to ride.
- Lower levels (1–2) suit warmups, recovery spins, and technique drills like fast cadence work.
- Mid levels (3–4) can feel like steady endurance and tempo riding when paired with a smooth cadence.
- Higher levels (5–6) are useful for short, strength-focused efforts, particularly if your bike has easier gearing.
- Feel varies with rider weight, tire pressure, roller tension, and gearing—consistency improves comparability.
| Resistance level | Best for | Session example |
|---|---|---|
| 1–2 | Warmup / recovery | 10–15 min easy spin + 5 x 30 sec fast legs |
| 3–4 | Endurance / tempo | 2 x 12 min steady with 5 min easy between |
| 5–6 | Short intervals / strength | 6 x 2 min hard, 2–3 min easy recovery |
Setup Basics for Stability and a Smoother Ride Feel
Small setup details make a big difference in how stable (and how loud) a trainer feels. A stable platform, consistent tire pressure, and correct roller contact help reduce vibration and make resistance feel more predictable.
For additional setup pointers that translate well to most indoor systems, BikeRadar’s indoor trainer setup tips are a helpful reference.
Noise, Heat, and Tire Wear: What to Expect Indoors
For a broader comparison of trainer types and what to expect, REI’s guide on how to choose bike trainers provides a useful overview.
Who This Trainer Stand Suits Best
Care and Safety Checks for Long-Term Use
Product Highlights at a Glance
Shop the featured option here: Magnetic Indoor Bike Trainer Stand for 24-28” & 700C Bikes – 6-Level Resistance. For a more comfortable “desk-and-ride” setup during easy spins, a handy add-on is a compact typing solution like the Wireless Retro Typewriter Keyboard with Stand & Round Keycaps.
FAQ
Will a 700C road bike fit on this trainer stand?
Yes, as long as the trainer supports 700C wheels and your rear axle hardware matches the clamp system. Center the wheel in the trainer and make sure the roller contacts the tire evenly before riding.
How can indoor trainer noise be reduced in an apartment?
Use a trainer mat, avoid knobby tires, keep tire pressure consistent, and set roller tension just high enough to prevent slipping. Adding a fan can also help you stay cooler without needing to ride at very high resistance.
Do the 6 resistance levels replace bike gears?
No—resistance levels and gears work together. Use the level to set the overall load range, then use your bike’s gears and cadence to fine-tune effort for each interval or steady segment.


Leave a comment